Diligence photos
Commercial Roof Inspection Photo Checklist for Owners and Brokers
A roof photo file should make commercial diligence faster without pretending photos replace qualified review. This guide shows owners, brokers, buyers, lenders, and roofers which roof, drainage, equipment, repair, and interior photos belong in the file.

Key takeaways
- A useful roof photo file starts with safe access limits, a roof area map, date context, weather context, and photo sequence.
- Owners and brokers should document wide roof views, drains, scuppers, ponding, seams, flashing, edges, rooftop equipment, repairs, and interior evidence.
- Photos should describe visible evidence without making unsupported inspection, engineering, warranty, code, or insurance conclusions.
- The best file helps buyers, lenders, insurers, roofers, and asset managers decide what evidence is still missing before the next roof decision.
A roof photo checklist is a decision tool, not a substitute for inspection
Commercial roof photos can move a deal, a loan file, a renewal, a reserve discussion, or a repair plan forward. They can also create false confidence when they are random, stale, unsafe, cropped too tightly, or disconnected from the building record. Owners and brokers often have roof photos somewhere: a listing folder, a property manager's phone, a contractor invoice, a past property condition assessment, or a tenant work-order file. The problem is not always the absence of photos. The problem is that the photos do not answer the questions a buyer, lender, roofer, insurer, or asset manager will ask.
A useful roof photo file does not try to turn a broker or owner into a roof consultant. It does not make engineering, code, warranty, or coverage conclusions. It organizes visible evidence so qualified parties can review the roof faster and so business stakeholders can see what is known, what remains unknown, and what should happen next.
That distinction matters. A photo can show ponding stains around a drain. It cannot prove how long water remained or whether insulation is wet. A photo can show a repaired seam. It cannot prove the repair was performed correctly or that the underlying cause was corrected. A photo can show rooftop equipment. It cannot prove a curb is watertight. A photo can show a clean roof field. It cannot prove there are no concealed moisture or deck issues.
The value of the checklist is practical. It helps owners and brokers gather the right evidence before diligence pressure starts. It helps roofers enter the conversation with context. It helps lenders see whether a remaining useful life estimate is well supported. It helps buyers price uncertainty separately from known repair cost. It helps asset managers keep portfolio records from becoming a pile of disconnected images.
Safety and access come before the photo file
No roof photo is worth unsafe access. Owners, brokers, tenants, maintenance staff, and buyers should not climb onto a roof, approach edges, use ladders, open hatches, or walk uncertain roof areas unless access is authorized, conditions are safe, and qualified people are involved. OSHA fall-protection rules, site-specific safety policies, weather conditions, roof access design, and contractor controls can all matter. A photo checklist should support a professional process, not encourage casual roof access.
That means the first decision is not "which photo should we take?" It is "who can safely and appropriately access this roof?" On some buildings, the answer may be a qualified roofing contractor, property condition assessor, roof consultant, engineer, facility team, or trained maintenance person. On other buildings, current roof access may be unavailable, unsafe, tenant-restricted, or not worth the risk until a qualified visit is scheduled.
The file should record access limits clearly. If a roof was not accessed, say so. If photos were taken from an adjacent building, drone, ladder, hatch, upper window, public vantage point, or past inspection, label that source and date. If some roof areas were inaccessible, list them. If snow, rain, darkness, equipment work, or safety restrictions limited the review, keep that caveat with the photos.
Access notes protect everyone. They prevent a buyer from assuming a full roof observation occurred when only one roof area was visible. They prevent a lender from overweighting photos taken from the ground. They prevent a broker from repeating a roof condition statement beyond the evidence. They also help a roofer plan the right visit, equipment, personnel, and owner expectations.
The best photo file starts with a roof area map
Before collecting close-ups, create a simple roof area map. It does not have to be a formal construction drawing. It can be an aerial image, site plan, prior roof plan, PCA exhibit, or marked-up sketch that labels roof sections. The point is to tie every photo to a place.
Commercial buildings often have more than one roof area: main warehouse, office addition, loading canopy, lower retail bay, penthouse, vestibule, stair tower, mechanical well, or older annex. Each area may have different age, system type, drainage, tenant consequence, and repair history. If the photo file treats the roof as one surface, it can hide the section that actually drives risk.
The map should identify:
- Roof areas by name or number.
- Primary drains, scuppers, gutters, and overflow paths where known.
- Rooftop equipment clusters.
- Hatches, ladders, and access points.
- Tenant spaces or sensitive areas below the roof.
- Known leak locations.
- Known repair or replacement areas.
- Areas not accessed or not photographed.
Every photo should be traceable back to this map. A close-up of a seam is almost useless if no one knows where it sits. A drain photo is much more useful when it is labeled "D-3, main warehouse roof, east side, May 2026." A broker does not need a complex system to achieve this. A numbered roof plan and consistent file names can be enough.
For owners, the roof map becomes a long-term record. For brokers, it becomes a pre-listing diligence tool. For buyers, it becomes a way to ask targeted questions. For roofers, it shortens the time between first review and useful recommendation.
Date, weather, and sequence matter
A roof photo without date and context can mislead. A dry-weather photo tells a different story than a photo taken after heavy rain. A photo taken before drain cleaning should not be treated the same as a photo taken after cleaning. A photo taken before a repair should not be mixed with a photo taken after the repair without labels.
At minimum, the file should capture:
- Photo date.
- Roof area.
- Photographer or source.
- Weather context.
- Whether the photo was before or after maintenance.
- Whether the photo was before or after repair.
- Whether roof access was direct or limited.
- Whether the photo is current or historical.
Sequence is especially important for drainage and leak questions. If a roof shows ponding, the next question is often whether the drains were clogged. If the drain was cleaned and water remained, that points to a different concern than temporary blockage. If a scupper was blocked before cleaning but clear after maintenance, the reserve discussion changes. If a tenant leak appears after a severe storm and then no post-event roof photos exist, the condition file remains thin.
The same principle applies to repairs. A repair invoice should be linked to pre-repair photos, repair-location photos, and post-repair photos when possible. Without sequence, the next reviewer may see a patch and not know whether it is an old stable repair, a recurring failure area, or a recent temporary measure.
Good sequencing keeps the file honest. It allows someone to say, "This was observed before cleaning," "This is the same drain after clearing," or "This area was not rechecked after repair." Those statements are more useful than vague confidence.
Wide shots create orientation
Close-up photos are tempting because they show detail. They are also easy to misuse when there is no orientation. A useful photo set starts with wide shots that show the roof area, drainage pattern, equipment layout, parapets, edge conditions, access point, and obvious surface changes. Wide shots should be taken from multiple directions when safe and practical.
A wide shot helps answer basic questions:
- How large is the roof area?
- How many roof sections are visible?
- Where are drains, scuppers, gutters, and equipment?
- Does water appear to have a clear path?
- Are there obvious patches, stains, walk paths, or traffic zones?
- Are there roof areas hidden behind parapets or equipment?
- Does the roof surface look uniform or mixed by section?
For brokers, wide shots reduce buyer confusion. A buyer who sees only close-ups of a patched drain may assume the whole roof is in poor condition. A buyer who sees only a clean field may miss the patched drain entirely. Wide shots provide context for both.
For roofers, wide shots are planning tools. They reveal equipment density, access difficulty, walk paths, parapet layout, and potential drainage constraints. For lenders, they help connect a PCA note to the actual roof surface. For owners, they create a baseline for future comparison.
The checklist should require a wide view before any close-up cluster. If the file includes ten close-ups and no orientation, it is incomplete.
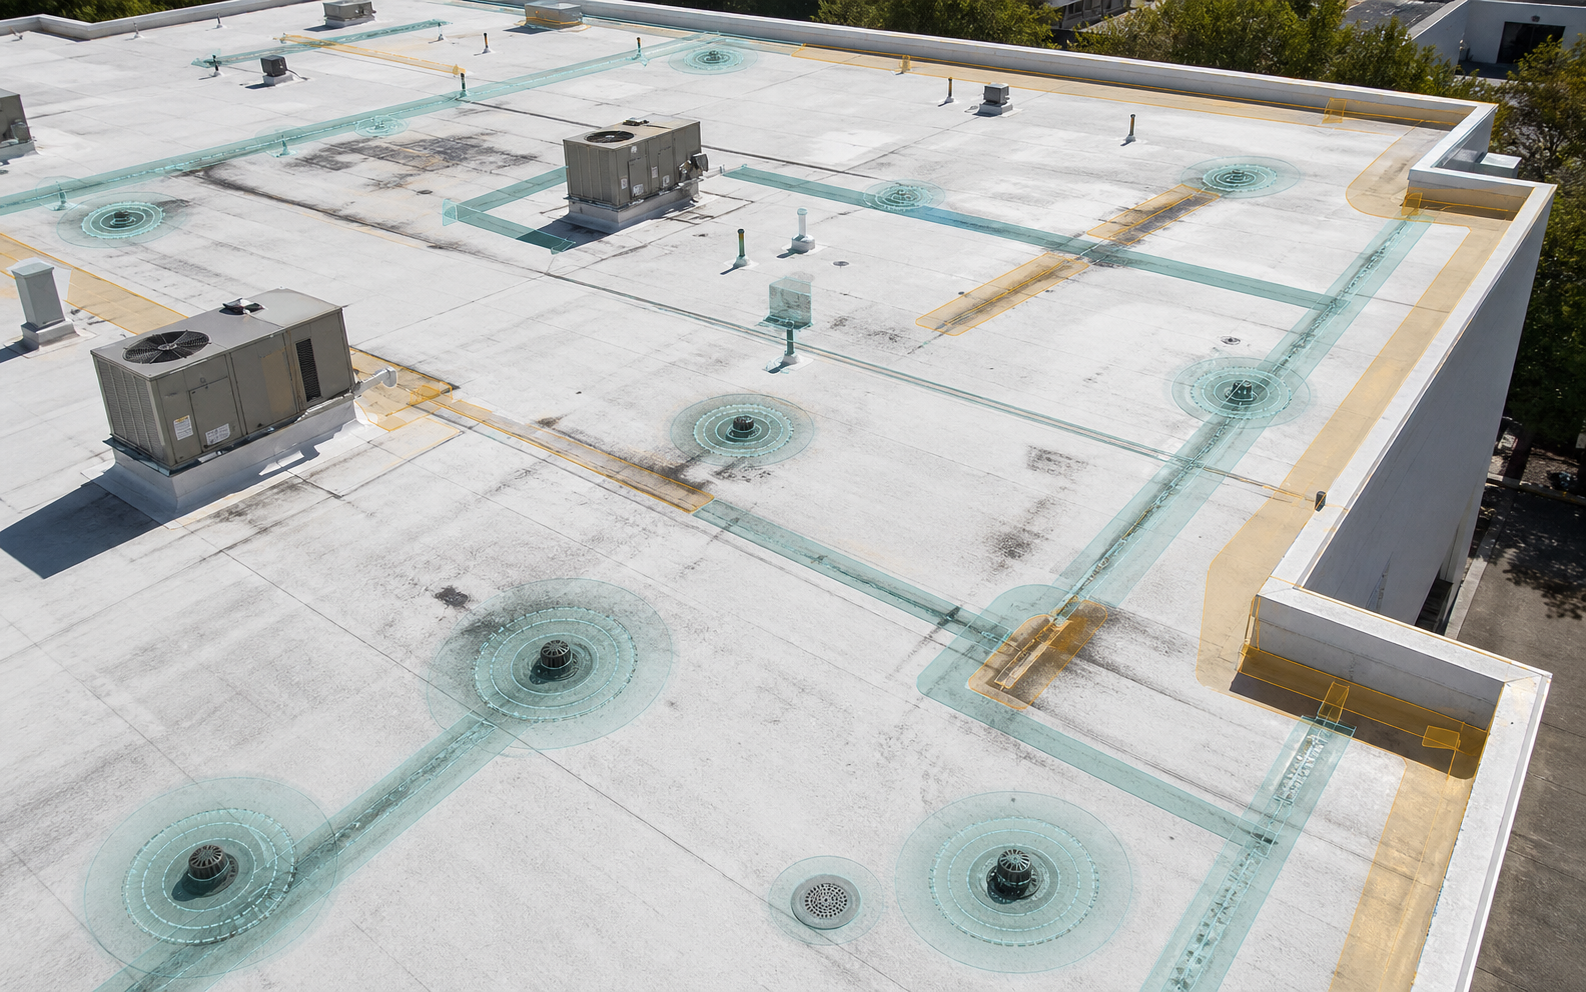
Drain and scupper photos are mandatory on low-slope roofs
Low-slope roof risk often concentrates around water. Drains, scuppers, gutters, downspouts, and overflow paths should be photographed clearly. This is not because every drainage detail is defective. It is because drainage behavior changes roof confidence.
For each drain, capture:
- A wide view showing the drain in roof-area context.
- A close-up of the strainer, bowl, clamping area, and surrounding membrane.
- Any ponding, staining, sediment ring, biological growth, or patching nearby.
- Any debris before and after cleaning.
- Any missing, damaged, or displaced strainer.
- Any interior evidence if the drain aligns with ceiling stains below.
For each scupper, capture:
- A roof-side close-up.
- A wider roof-side view showing whether water can reach it.
- The parapet or wall context.
- Exterior wall staining or downstream water path when visible.
- Debris, blockage, deterioration, or repair materials.
- Gutter, conductor head, or downspout connection where present.
For gutters and downspouts, capture debris, sagging, disconnected sections, overflow staining, facade staining, soil erosion, ice history when visible, and discharge location. A roof can look acceptable on the surface and still have water-management risk at the edge.
This topic is covered in more depth in the [roof drains, scuppers, ponding water, and hidden capex guide](/insights/commercial-roof-drainage-ponding-hidden-capex/). For the photo checklist, the key rule is simple: do not submit a low-slope roof photo file without drainage evidence.
Ponding photos need duration and follow-up
Ponding water is one of the most common photo findings and one of the easiest to overstate. A photo of standing water proves water was present when the photo was taken. It does not prove duration, cause, or hidden damage. The file should make the photo useful by adding context.
When ponding is observed, record:
- Date and time of photo.
- Recent weather if known.
- Whether drains were clogged or clear.
- Whether debris was removed before or after the photo.
- Approximate location on roof area map.
- Nearby drains, scuppers, seams, curbs, penetrations, or repairs.
- Whether the same area appears in prior photos.
- Whether interior leaks or tenant complaints align with the area.
- Whether follow-up photos were taken after time passed or after cleaning.
The best ponding sequence has three views: context, close-up, and follow-up. The context view shows where the water sits. The close-up shows staining, depth clues, membrane condition, and adjacent details. The follow-up shows whether the water remained after cleaning or after time passed.
This sequence matters financially. Temporary water around a clogged drain may be a maintenance issue. Water that remains after clearing and appears repeatedly in the same low area may become a reserve or inspection trigger. Water near seams, penetrations, or repeated patches deserves more attention than water on a non-critical area with clear maintenance history.
Owners should avoid deleting unflattering ponding photos. A hidden condition becomes more expensive when it appears late. A well-labeled ponding photo gives a roofer or consultant a chance to separate maintenance, repair, drainage correction, and capital planning.
Membrane field photos should show condition, repairs, and consistency
The roof field is the broad membrane area between edges, drains, equipment, penetrations, and transitions. It should be photographed in both wide and mid-range views. A field photo helps show whether the roof surface is consistent, patched, deteriorated, blistered, split, wrinkled, punctured, heavily trafficked, coated, recovered, or mixed by roof section.
The checklist should include:
- Representative field views for every roof area.
- Seams or laps in multiple locations.
- Any open seams, splits, punctures, blisters, ridges, wrinkles, or exposed reinforcement.
- Coating condition where a coating is present.
- Patch clusters, repair material changes, and repeated repair zones.
- Areas with foot traffic, tools, debris, or equipment service damage.
- Transitions between roof systems or roof sections.
Do not rely on one flattering field photo. A large warehouse roof may include clean areas and distressed areas. A roof can look uniform from a drone and show significant detail issues up close. A roof can also look rough in one close-up while the broader area is serviceable. The file should show both.
Repair photos should be tied to location and date. A patch is not inherently bad. Many roofs have repairs that perform well. The underwriting question is whether repairs are isolated, repeated, temporary, tied to a known cause, or concentrated around a drainage or equipment problem. A photo file that shows only patch close-ups without history invites speculation.
Flashing, parapets, and edge metal deserve their own pass
Commercial roof failures often start at transitions: walls, parapets, edges, curbs, penetrations, expansion joints, skylights, hatches, and terminations. A photo checklist that focuses only on the field membrane misses many of the most important details.
Photograph:
- Base flashing at walls and parapets.
- Counterflashing or termination conditions.
- Coping caps and seams.
- Edge metal and fascia.
- Corners and perimeter zones.
- Expansion joints.
- Hatches and ladder-access curbs.
- Roof-to-wall transitions.
- Signs of open laps, loose metal, displacement, sealant failure, staining, or repeated repairs.
Wind exposure makes edge and parapet evidence especially important. A roof field may look acceptable while coping, edge metal, or terminations carry visible concern. The [wind uplift, perimeter edge, and rooftop equipment guide](/insights/commercial-roof-wind-uplift-edge-equipment-risk/) explains why edges and equipment should not be treated as secondary details.
Brokers should be careful with listing photos. A buyer may ask for edge conditions because they affect replacement scope, repair urgency, and reserve confidence. Owners should photograph edges during routine roof reviews because edge conditions can change after wind, rooftop work, or deferred maintenance.
The photo rule is practical: every roof area should include field, drainage, transition, and edge evidence. Missing one of those categories weakens the file.
Rooftop equipment can change the roof story
Rooftop equipment is one of the clearest reasons commercial roofs need more than age evidence. HVAC units, exhaust fans, curbs, rails, solar attachments, refrigeration lines, gas piping, satellite equipment, communication gear, and abandoned penetrations can all create roof vulnerabilities. They can also change drainage paths, increase traffic, and complicate repairs.
For each equipment cluster, capture:
- Wide context showing equipment layout.
- Curb flashing and base conditions.
- Pitch pockets or penetration seals when present.
- Condensate discharge paths.
- Service paths and walk pads.
- Abandoned curbs, unused penetrations, or temporary patches.
- Debris or materials left by service vendors.
- Ponding behind curbs or around equipment platforms.
- Rust, staining, or evidence of repeated maintenance.
Equipment photos should be tied to tenant and service history where possible. A restaurant tenant may have different rooftop conditions than an office tenant. A medical use, industrial process, or refrigeration tenant may have equipment that matters to the roof. Tenant improvements can add penetrations long after the roof was installed. If no one records those changes, the roof age field becomes less useful.
For owners, this is a vendor-control issue. If HVAC vendors, electrical contractors, telecom vendors, or tenant contractors access the roof, the owner should preserve before-and-after condition notes when work is material. For brokers, equipment photos reduce late buyer questions. For roofers, equipment context helps explain why a roof with a documented installation date still has low confidence in certain areas.
Penetrations, curbs, hatches, and skylights need close-ups and context
Penetrations are small compared with the roof field, but they can drive recurring leaks. Pipes, vents, conduits, exhaust fans, skylights, hatches, drains, supports, posts, and abandoned openings should be photographed by location. The file should show both the close-up detail and the surrounding roof area.
A useful penetration photo set includes:
- Context view showing location on roof.
- Close-up of the penetration or curb.
- Flashing or sealant condition.
- Nearby ponding, staining, or patching.
- Evidence of abandoned or temporary details.
- Interior evidence below if known.
The photo file should not use a close-up to make a conclusion. A cracked sealant bead may be visible, but whether it is active, isolated, or part of a broader issue requires review. A skylight may look dirty or aged, but a qualified party should assess actual condition and safety. A hatch may show staining, but the source may be roof, wall, access, condensation, or another issue.
The purpose is to make questions specific. Instead of "roof has many penetrations," the file can show "north office roof has five HVAC curbs and two abandoned pipe penetrations; repeated patching visible at curb C-2." That is actionable.
Interior photos complete the roof evidence chain
A roof photo file should include interior evidence when there are known leaks, ceiling stains, tenant complaints, odor concerns, damaged finishes, rust, or recurring work orders. Interior photos connect roof condition to consequence. They also help distinguish a roof concern over a vacant storage area from a roof concern over a sensitive tenant operation.
Interior photos should capture:
- Wide room or tenant-space context.
- Close-up of ceiling stain, wet tile, damaged finish, or corrosion.
- Date and location.
- Roof area above if known.
- Weather or event context if known.
- Whether the interior issue recurred.
- Whether ceiling repairs occurred before the roof issue was documented.
Owners should avoid repairing interior finishes before preserving basic evidence. That does not mean delaying urgent mitigation or tenant response. It means keeping enough record to connect the interior event to the roof review. A replaced ceiling tile with no photo and no location note can erase useful evidence.
Brokers should ask sellers for leak logs, work orders, and tenant complaint history before listing a building with a low-slope roof. The [broker flat-roof listing diligence guide](/insights/commercial-roof-broker-listing-diligence/) covers the broader pre-listing record set. Photos make that record stronger when they are dated and mapped.
Interior evidence also protects against overclaiming. A ceiling stain does not automatically prove a roof membrane failure. It may involve plumbing, HVAC condensation, wall leakage, drain piping, or another source. The file should preserve evidence without jumping to cause.
The owner photo workflow should be repeatable
Owners need repeatability more than a one-time photo burst. A repeatable workflow turns roof photos into an operating control. The same roof areas should be photographed over time so changes become visible.
A practical owner schedule may include:
- Baseline photo set when a property is acquired or records are organized.
- Seasonal roof photos before and after high-risk weather periods.
- Photos after major storms or unusual rainfall when safe and appropriate.
- Photos after roof repairs.
- Photos after rooftop equipment work.
- Photos before lender renewal, insurance renewal, sale, or major lease event.
- Photos when tenant leak tickets occur.
The owner should keep the photo file with maintenance invoices, repair invoices, warranty documents, roof plans, access notes, and tenant work orders. Photos should not live only on a phone or in a contractor email chain. The next manager, buyer, lender, or roofer needs the history.
A repeatable file can be simple:
| Folder or field | Purpose |
|---|---|
| Roof area map | Shows where photos belong |
| Baseline photos | Establishes current known condition |
| Maintenance photos | Shows drains, debris, and routine control |
| Repair photos | Shows pre-repair and post-repair evidence |
| Weather-response photos | Shows what changed after exposure |
| Interior evidence | Connects roof concerns to consequence |
| Open questions | Tracks missing access, testing, or review needs |
The value is not perfection. It is continuity. A roof file that survives staff changes and transaction pressure is worth more than a perfect photo set that nobody can find.
The broker pre-listing photo workflow should reduce surprises
Brokers can use a roof photo checklist to reduce late diligence friction without certifying roof condition. The broker's job is not to conclude the roof is good, bad, insurable, warrantable, or code-compliant. The broker's job is to help the seller organize evidence before buyers ask the obvious questions.
Before marketing a building with a low-slope roof, a broker should ask for:
- Current roof area map or aerial.
- Current wide roof photos.
- Drain and scupper photos.
- Edge, parapet, flashing, and rooftop equipment photos.
- Known ponding locations.
- Known leak history and interior photos if present.
- Repair invoices and matching repair-location photos.
- Warranty and maintenance obligations if available.
- PCA roof excerpts if a recent PCA exists.
- Areas not accessed or not photographed.
The broker should also pressure-test roof language. "New roof" should be replaced with scope-specific language when possible. "No leaks" should be replaced with documented leak history or seller statement limits. "Roof in good condition" should be supported by current evidence or avoided. The photo file helps the broker make fewer unsupported claims.
Buyer confidence often depends on whether the seller appears organized. A seller with current mapped photos, repair history, and maintenance records is easier to diligence than a seller with a vague roof age and no current roof evidence. Good photos do not make a weak roof strong. They make the risk legible.
A buyer should use photos to decide what evidence is missing
Buyers should not treat photos as final proof. They should use photos to decide what still needs review. A photo file can show whether the roof deserves ordinary diligence, a roof-specialist visit, moisture evaluation, seller repair request, reserve adjustment, or a broader capex discussion.
Buyers should ask:
- Are all roof areas represented?
- Are photos current?
- Are photos mapped?
- Are drains and scuppers shown?
- Are edges and rooftop equipment shown?
- Are known leak locations included?
- Are repair photos linked to invoices?
- Are access limits clear?
- Are weather or maintenance contexts noted?
- Are there enough photos to support the seller's roof statements?
If the answer is no, the buyer should not automatically assume the worst. The buyer should define the missing evidence and request it. Missing drain photos may require a roofer visit. Missing leak history may require seller follow-up. Missing repair-location mapping may require invoice review. Missing access may require a condition in the diligence schedule.
For 1031 exchange buyers, this discipline matters because timing pressure makes late roof uncertainty expensive. The [1031 exchange roof records guide](/insights/commercial-roof-records-1031-exchange-acquisition/) explains how roof records should be organized before replacement-property decisions depend on them.
Lenders and insurers should look for evidence quality
Lenders and insurers may not need every photo that a roofer needs, but they do need evidence quality. A roof file that includes only a few clean field photos is weaker than a file that shows drains, edges, equipment, repairs, interior history, and access limits. A single remaining useful life estimate is more defensible when the visible evidence behind it is available.
Evidence quality can be scored informally:
| Evidence state | Confidence effect |
|---|---|
| Current mapped photos with drains, edges, equipment, and interior history | Higher confidence |
| Current photos but no map or missing drainage details | Moderate confidence with follow-up |
| Historical photos only | Lower confidence unless current condition is otherwise supported |
| Dry-weather photos with known ponding concerns | Incomplete evidence |
| No access notes or missing roof sections | Lower confidence |
| Photos conflict with seller statements | Requires explanation |
For lenders, this can affect reserve comfort, repair conditions, or requests for roof-specific review. For insurers and risk engineers, it can affect maintenance recommendations, loss-control follow-up, and the distinction between a routine maintenance issue and a chronic roof condition.
The key is not to make a technical conclusion from a photo set. The key is to decide whether the file is strong enough for the decision being made. A refinance, acquisition, major lease, renewal, or portfolio triage may require different evidence than routine ownership monitoring.
Commercial roofers should ask for the photo file before the visit
Commercial roofers can improve first conversations by asking owners and brokers for a structured photo file before visiting the site. The roofer still needs site-specific review where appropriate, but a good photo file helps avoid vague discovery calls.
Before a site visit, a roofer can request:
- Roof area map or aerial.
- Current wide photos.
- Drain and scupper photos.
- Known leak locations.
- Interior stain photos.
- Repair invoice locations.
- Rooftop equipment photos.
- Access notes.
- Prior inspection or PCA roof excerpts.
- Warranty or maintenance obligations.
This allows the roofer to plan the visit, identify likely priority areas, and avoid overclaiming before seeing the roof. It also gives the owner a more professional experience. Instead of asking only "How old is the roof?" the roofer can ask better questions: Which roof area has recurring leaks? Which drains are hard to keep clear? Which equipment was added after the last roof work? Which photos are current and which are old?
That advisory posture matters for channel partnerships. Asset Optimix is built around the idea that commercial roof evidence should be organized before intervention timing becomes a crisis. Roofers are often the party best positioned to turn scattered photos into an owner decision.
The photo file should separate evidence from conclusions
One of the most important rules is language discipline. A photo label should describe what is visible, not what someone hopes it proves.
Weak labels include:
- "Bad roof."
- "Needs replacement."
- "Storm damage."
- "Warranty issue."
- "Code problem."
- "No concern."
Stronger labels include:
- "Ponding stain near drain D-2, main warehouse roof, May 2026."
- "Open-looking seam at west parapet, access limited, qualified review needed."
- "Patch cluster near HVAC curb C-4, repair history pending."
- "Ceiling stain in Suite 104 below office roof area, tenant reported after heavy rain."
- "Scupper S-1 clear after debris removal, follow-up after rain not documented."
The stronger labels do not avoid the issue. They make the evidence more reliable. They also protect brokers, owners, and roofers from turning a photo file into unsupported claims.
This is especially important after weather exposure. A hail, wind, or heavy-rain event may justify updated photos and inspection priority. It does not prove property-specific roof damage by itself. The [roof weather risk and physical underwriting guide](/insights/roof-weather-risk-physical-underwriting/) explains that distinction in more detail.
Photo quality standards should be simple and enforced
Photo quality does not need to be fancy. It needs to be usable. A blurry close-up with no location may be worse than no photo because it creates a false sense of documentation. A good photo should show enough context, be in focus, be dated, and be tied to a roof area.
Use these standards:
- Take a wide photo before close-ups.
- Keep the horizon and roof area understandable.
- Avoid extreme zoom unless paired with context.
- Do not crop out nearby drains, seams, curbs, or edges.
- Do not use filters or edits that change condition appearance.
- Photograph labels or notes separately if needed, not over the roof detail.
- Include a scale reference only when safe and appropriate.
- Retain original image files where possible.
- Store photos in a shared property file, not only in text messages.
File naming can be basic:
```text 2026-05-28_main-roof_D-3_drain-context.jpg 2026-05-28_main-roof_D-3_drain-closeup-before-cleaning.jpg 2026-05-28_main-roof_west-parapet_edge-metal.jpg 2026-05-28_suite-104_ceiling-stain.jpg ```
The exact naming convention is less important than consistency. The next reviewer should be able to find the roof area, date, and subject without guessing.
What to photograph before a sale, refinance, or renewal
A time-sensitive event needs a complete but practical set. The file should not wait until a buyer, lender, or underwriter asks. Owners and brokers should prepare the roof photo set before the conversation becomes adversarial.
Minimum pre-event set:
| Category | Required photos |
|---|---|
| Roof overview | Aerial or roof area map plus wide shots of each roof area |
| Drainage | Drains, scuppers, gutters, downspouts, overflow paths, ponding areas |
| Membrane | Representative field photos, seams, repairs, coating condition if present |
| Transitions | Flashing, parapets, edge metal, corners, hatches, expansion joints |
| Equipment | HVAC curbs, penetrations, service paths, condensate, abandoned details |
| Interior | Known stains, leak locations, tenant spaces affected |
| Records | Photos linked to repair invoices, maintenance visits, and access limits |
If time is limited, do not skip drainage and edges. Those are often the categories that trigger follow-up. If roof access is not available, say so and provide the best safe evidence available while scheduling qualified review when needed.
The pre-event file should also include a short open-issues list. For example: "office roof not accessed," "seller has not located 2021 repair invoice," "ponding near drain D-2 observed before cleaning only," or "tenant leak tickets requested." Open issues are better than silent gaps.
What to photograph after weather exposure
Weather exposure should trigger evidence gathering when the roof matters to a business decision. Heavy rain, severe wind, hail, freeze-thaw cycles, and tropical rainfall can reveal vulnerabilities. Public weather records can provide exposure context, but property-specific photos and records are still needed.
After material exposure, photograph when safe and appropriate:
- Wide roof areas.
- Drains, scuppers, gutters, and overflow paths.
- New debris or blockage.
- Ponding or sediment rings.
- Edge metal, coping, and parapets.
- Rooftop equipment and curbs.
- New or changed patches, punctures, or displaced materials.
- Interior stains or tenant impact.
- Areas where temporary action was taken.
The file should include timing. Was the photo taken the same day, next day, one week later, or after maintenance? Were drains cleared before photos? Were temporary repairs made before a qualified review? Without timing, the weather-response file can become hard to interpret.
Do not use weather-response photos as a shortcut to a claim, coverage, code, warranty, or engineering conclusion. Use them to prioritize review, document condition, and support the next responsible action.
What to photograph after repairs
Repairs should leave a photo trail. The trail does not have to be elaborate, but it should show what was addressed and whether the location was rechecked.
For each material repair, keep:
- Pre-repair condition photo.
- Repair location on roof map.
- During-repair photo if provided by the contractor.
- Post-repair photo.
- Invoice or work-order reference.
- Follow-up photo after rain or after a reasonable observation period when relevant.
- Note of unresolved cause if the repair was temporary.
This is where many roof files fail. An owner may have invoices that say "repair leak," but no location. A buyer may see patches but no repair history. A lender may see a recent repair cost but not know whether repeated leaks are still occurring. A roofer may inherit old work without knowing what was done.
Repair photos help separate stable repairs from recurring problems. A one-time patch around a known puncture may not change the reserve much. Repeated patches around the same drain, curb, or seam may indicate a condition that deserves deeper review.
Portfolio teams need consistency across buildings
Owners with multiple buildings should use the same photo categories across the portfolio. Otherwise, one property will have excellent roof evidence while another has only two stale photos and a vague roof age. Inconsistent files make triage harder.
A portfolio photo standard should include:
- Same roof area naming approach.
- Same required photo categories.
- Same file naming rules.
- Same storage location.
- Same access-limit notes.
- Same process for weather-response photos.
- Same process for repair photos.
- Same annual or seasonal update cadence.
This helps asset managers and municipalities compare roofs fairly. A small building with poor evidence may need review before a larger building with strong maintenance history. A public facility with high service consequence may need priority even if the roof age is not the oldest. Consistent photos make those decisions more defensible.
The goal is not to turn every roof into a perfect dataset. The goal is to make uncertainty visible at the portfolio level. A missing photo category is itself a signal.
A practical checklist for owners and brokers
The following checklist can be used before a sale, financing event, renewal, repair planning meeting, or portfolio review.
| Step | Evidence to gather | Why it matters |
|---|---|---|
| 1 | Confirm safe, authorized access or record access limits | Prevents unsupported assumptions about observation scope |
| 2 | Create or mark up roof area map | Ties every photo to a place |
| 3 | Take wide photos of each roof area | Provides orientation and section context |
| 4 | Photograph drains, scuppers, gutters, and overflow paths | Documents water-management evidence |
| 5 | Photograph ponding, staining, debris, and follow-up after cleaning | Separates temporary maintenance from chronic condition |
| 6 | Photograph membrane field, seams, patches, and traffic areas | Shows representative visible condition |
| 7 | Photograph flashing, parapets, edges, corners, and transitions | Captures common vulnerability areas |
| 8 | Photograph rooftop equipment, curbs, penetrations, and service paths | Connects roof risk to building operations |
| 9 | Photograph interior stains and tenant impact when present | Connects roof evidence to consequence |
| 10 | Link photos to invoices, leak logs, maintenance notes, and warranties | Turns images into a usable property file |
| 11 | List missing roof areas, stale photos, and unresolved questions | Keeps uncertainty visible |
| 12 | Decide the next action | Maintenance, roofer review, buyer request, reserve update, or professional evaluation |
The checklist should be repeated when the decision changes. A sale file may need current photos. A refinance may need reserve support. A post-storm review may need exposure response. A repair plan may need pre-repair and post-repair sequence.
What the photo file should not claim
A strong photo file has limits. It should not claim that the roof is code-compliant, warrantable, insurable, damage-free, properly designed, structurally adequate, or free of hidden moisture unless qualified review supports that conclusion. It should not claim that a storm caused damage from photos alone. It should not claim that no leaks exist because no stains were photographed. It should not claim remaining useful life from images alone.
The file should use practical boundaries:
- Photos show visible condition at a date and location.
- Photos may support follow-up questions.
- Photos may support maintenance and repair planning.
- Photos may help a qualified party prioritize review.
- Photos do not replace roof inspection, engineering review, legal advice, insurance advice, lender underwriting, or emergency repair.
These limits do not make the photo file weaker. They make it easier to trust.
A good roof photo file makes the next conversation shorter
The best commercial roof photo files are not complicated. They are organized. They show the whole roof before showing details. They map photos to roof areas. They document drains, scuppers, edges, equipment, repairs, and interior consequence. They record date, weather, access limits, and sequence. They preserve uncertainty instead of hiding it.
For owners, that means fewer surprises during sale, refinance, renewal, or repair planning. For brokers, it means fewer vague roof claims and faster buyer diligence. For roofers, it means better first conversations and more useful site visits. For lenders and insurers, it means evidence quality is easier to judge. For asset managers and municipalities, it means portfolio triage can be based on comparable records instead of scattered images.
A commercial roof photo checklist will not answer every roof question. It should not try. Its job is to make visible evidence usable, connect that evidence to records, and show where professional review is still needed. That is enough to turn a messy roof folder into a decision file.
Frequently asked questions
Can owner or broker roof photos replace a commercial roof inspection?
No. Photos can organize visible evidence and guide follow-up questions, but they do not replace qualified roof inspection, engineering review, code review, insurance advice, warranty review, lender underwriting, or emergency repair.
What roof photos should a broker gather before listing a building?
Gather a roof area map, wide photos of each roof area, drains and scuppers, ponding locations, seams, flashing, edge metal, rooftop equipment, known repairs, interior stains, access limits, and links to relevant invoices or maintenance notes.
Why do buyers and lenders care whether roof photos are mapped?
Mapped photos connect visible conditions to a specific roof area, drain, scupper, tenant space, repair invoice, or access limit. Without location context, close-up photos are easy to misunderstand.
Sources and limits
Research basis reviewed against ASTM PCA framing, Fannie Mae PCA guidance, WBDG roofing and moisture guidance, OSHA fall-protection guidance, EPA moisture-control guidance, FEMA low-slope roof mitigation guidance, NOAA/NCEI, NWS, IBHS, and BLS public sources. These sources support context, definitions, and public guidance. They do not turn a remote report into a roof-specific inspection, coverage opinion, engineering opinion, code opinion, warranty interpretation, or project bid.
- NOAA/NCEI Storm Events DatabaseOfficial storm-event records used for weather exposure context, not parcel-specific proof of damage.
- National Weather Service severe weather definitionsPublic definitions for severe thunderstorm, hail, and wind criteria.
- WBDG moisture management strategiesBuilding-enclosure moisture control context for design, construction, operation, and maintenance.
- WBDG roofing systems knowledge areaRoofing-system degradation, drainage, corrosion, penetration, and maintenance context.
- FEMA low-slope roof systems mitigation fact sheetPublic-facility low-slope roof mitigation framing for wind, wind-driven rain, and rainfall events.
- IBHS commercial property loss-prevention researchCommercial-building wind and roof vulnerability context, including roof membrane, edge flashing, rooftop equipment, and load-path focus areas.
- ASTM E2018 property condition assessment guideCommercial property condition assessment framing for transaction diligence, observed condition, and capital planning scope awareness.
- Fannie Mae Multifamily PCA underwriting guidanceUnderwriting inspection and replacement-reserve context for property condition, deferred maintenance, useful life, and repair needs.
- OSHA fall protectionOfficial workplace fall-protection context for safety boundaries around roof access and observation work.
- EPA moisture-control guidanceOperating and maintenance context for moisture-controlled buildings, including low-slope roof drainage principles.
- BLS Producer Price IndexPublic construction and roofing contractor price-index categories for cost-trend context, not project-specific bids.